
Quick start
Choose an organization, create a key, connect your application and verify the first request.
Use your operator's customer-app URL. For a local installation, first follow Installation. The app's Setup guide supplies the API endpoint for that deployment; the customer-app URL and API URL are different.
1. Sign in and choose an organization
Use an enabled login method or open your invitation. Check the organization shown in the selector. If you need a shared workspace, choose Create organization and finish provisioning before continuing.
Your role controls the pages and actions available. Ask an administrator if you need membership or billing access; creating a key does not grant those permissions.
2. Create an API key
Open the account menu at the foot of the sidebar, choose API keys, then Create API key:
- Give the key a name you will recognize.
- Check Permanent billing organization — this is the payer.
- Answer the team question: with one team it is preselected; with several, choose the team this key reports against or No team attribution. The choice cannot be changed later. Agent is optional.
- Create the key, then copy the one-time secret and store it securely.
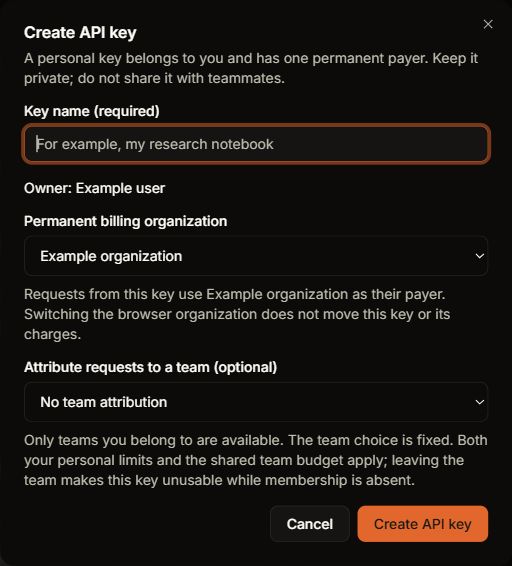
The key belongs to you; its payer and default team remain fixed when you switch organizations.
Use an inference key for model calls. A management key is a separate credential class and cannot invoke inference. Never put a secret in source control, a URL, a screenshot or a support message.
3. Check the endpoint and model
Open Setup guide from the sidebar. Find API base URL for SDKs and Available model. The generated connection example contains the exact model ID to use; a dropdown may show a friendly model name.
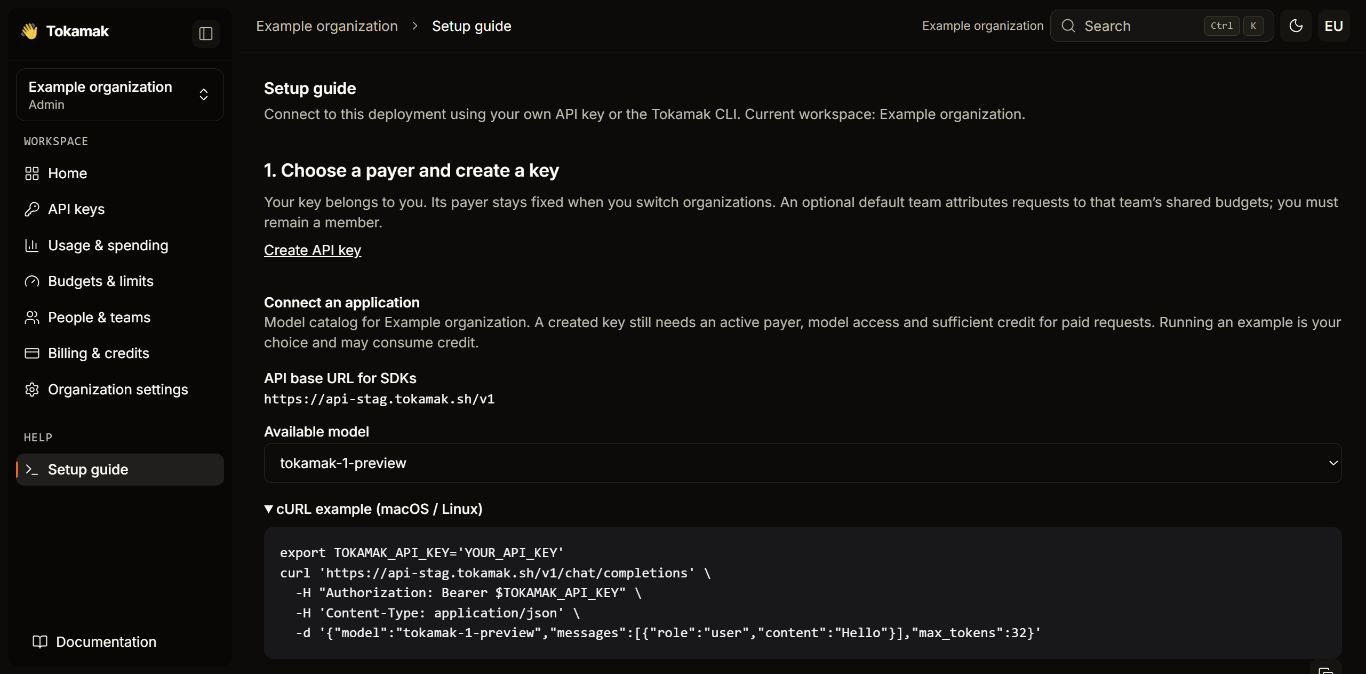
You can also list models with your key. This example is for a local gateway; replace the base URL with your deployment's value.
export TOKAMAK_API_BASE='http://localhost:8080/v1'
export TOKAMAK_API_KEY='YOUR_API_KEY'
curl "$TOKAMAK_API_BASE/models" \
  -H "Authorization: Bearer $TOKAMAK_API_KEY"
Select a model that supports the request dialect you will use. If billing is enforced, the payer needs sufficient credit; applicable budgets must also allow the request.
4. Make a request
Replace MODEL_ID_FROM_CATALOG with an exact catalog ID. This call may consume the organization's credit.
curl "$TOKAMAK_API_BASE/chat/completions" \
  -H "Authorization: Bearer $TOKAMAK_API_KEY" \
  -H 'Content-Type: application/json' \
  -d '{"model":"MODEL_ID_FROM_CATALOG","messages":[{"role":"user","content":"Hello"}],"max_tokens":32}'
For an OpenAI-compatible client, use the same base URL, including /v1, and this key. See Bring your own client for SDK examples. For Anthropic Messages or Responses, use the corresponding dialect and a compatible model.
5. Confirm what happened
Open Analytics, choose Me, and check the organization and time range. Open Requests and inspect the request details when available. A created key alone does not establish a successful connection; look for the request you just made. Usage can take time to appear.
| Result | Next action |
|---|---|
401 | Check the credential, expiry and configured endpoint. |
403 | Read the refusal code; verify permissions, payer and team membership. |
402 | Check the payer's credit or debt with a billing administrator. |
429 | Check applicable budgets and the reset window; other rate limits may also return 429. |
503 | Retry or contact the operator; this is not evidence that you need more credit. |
Prefer a coding tool?
http://localhost:8080/v1Use as the client's base URLhttp://localhost:8080Use with tokamak auth --api-urlUse the installer offered by your deployment's Setup guide, then authenticate to its gateway URL without the /v1 suffix:
tokamak auth --api-url http://localhost:8080
tokamak auth status
tokamak launch claude
# Or: tokamak launch codex
CLI login creates its own credential through browser approval. It does not automatically reuse the manually created key above. Installer availability depends on published CLI artifacts. See Coding agents.
Next: invite colleagues, set a budget, or review credit.